3D Printed Press Dies Part 1
Die Design
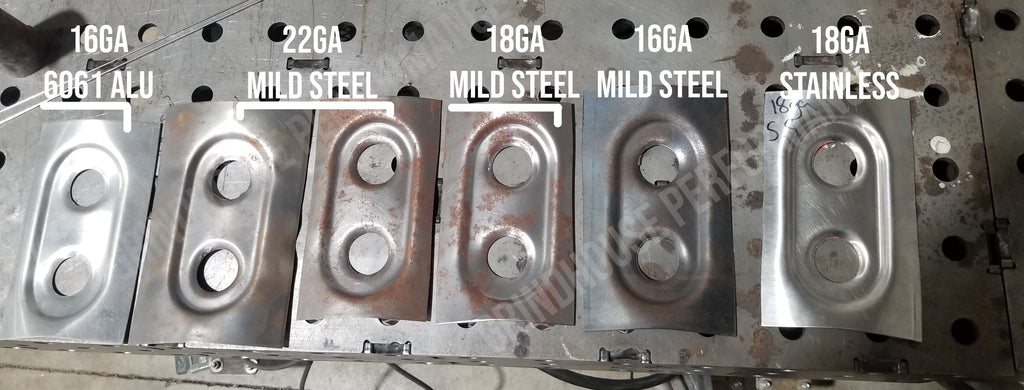
The profile of the dies are reasonably complex, featuring two 1" round dimples, a large slotted oval dimple, as well as the overall profile of the die being curved. Something similar to this could be machined with the right tooling and equipment, but for a small scale custom shop, that's typically outside of the reasonable price range if they couldn't manufacture them in-house. To give an idea, I had the .stl's priced to be machined in steel, and was quoted by two separate machine shops an expense of ~$1800 per die to have them made for me. This isn't really feasible or realistic expense to pass onto a customer job, but if you're only needing a handful made, it might be worth considering an experiment with 3D Printed press dies. I'm planning to experiment quite a bit more with this in the future based on the (almost overwhelming) feedback from viewers watching the initial experiment
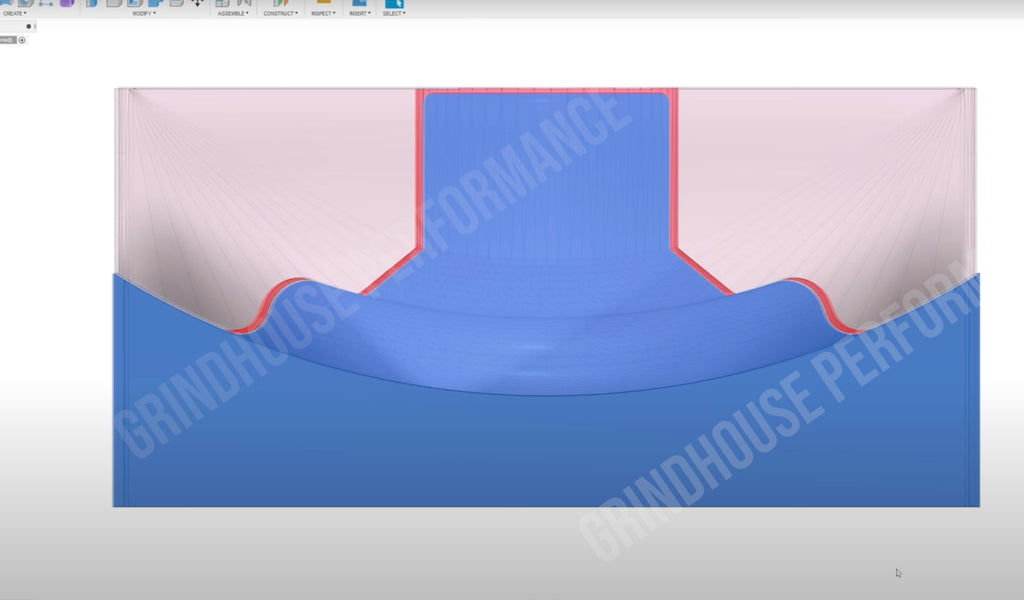
I didn’t make exact mirrors of the top and bottom dies. Having an exact fit between the dies doesn't leave any room for the metal and would immediately destroy the plastic. With the two dies overlaid, you can see a slight air gap in all of the areas I thought could get bound up by having a piece of sheet metal sandwiched between. Ideally, this air gap will correspond to the target material thickness, but since I'm going to be pressing multiple thicknesses as part of the initial testing, I went with an 18ga gap you can see highlighted in red.
Print Settings
I'm using Ultimaker Tough PLA as the filament for this test, and I've left most of the Cura settings to default for the profile. The main adjustments made to the print were the infill and wall thickness settings. With my .4mm nozzle, Cura estimated over three and a half days to print these dies at 100% infill. To reduce print time, I've set the wall thickness to 3mm, and the bottom thickness to 0mm, which leaves the bottom open to be filled with fiberglass resin. I've also changed the infill percentage to be higher the closer it gets to the top surface. The top is solid, then the next 3mm is 90% infill, then 3mm of 45% infill, then the rest of the part is a 22.5% infill. A similar approach was taken by Mike over at Roadster Shop. The thought is this will allow the resin to have more surface area to bond to, and increase the overall strength of the compressed surfaces.
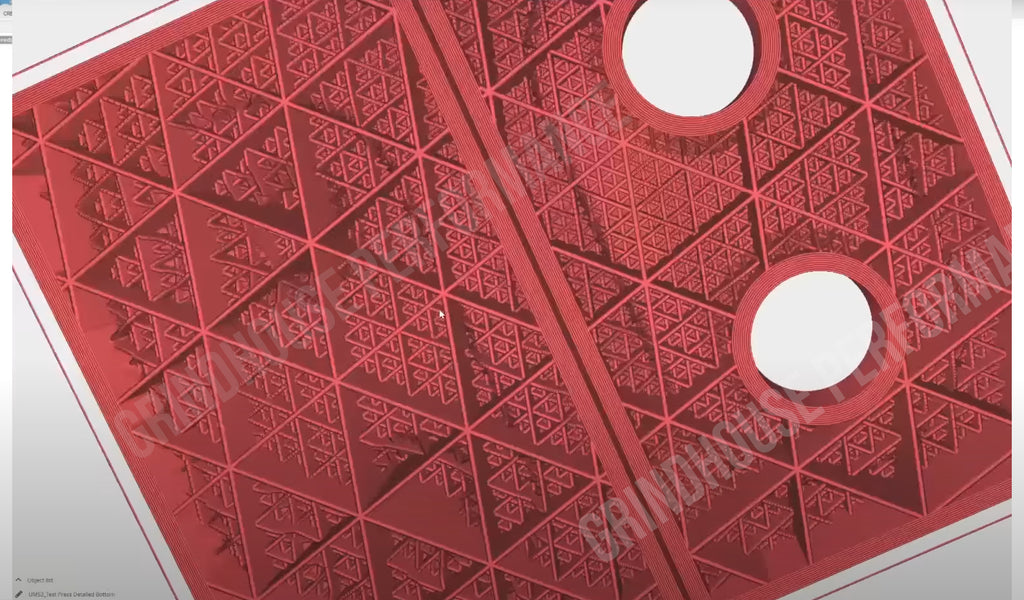
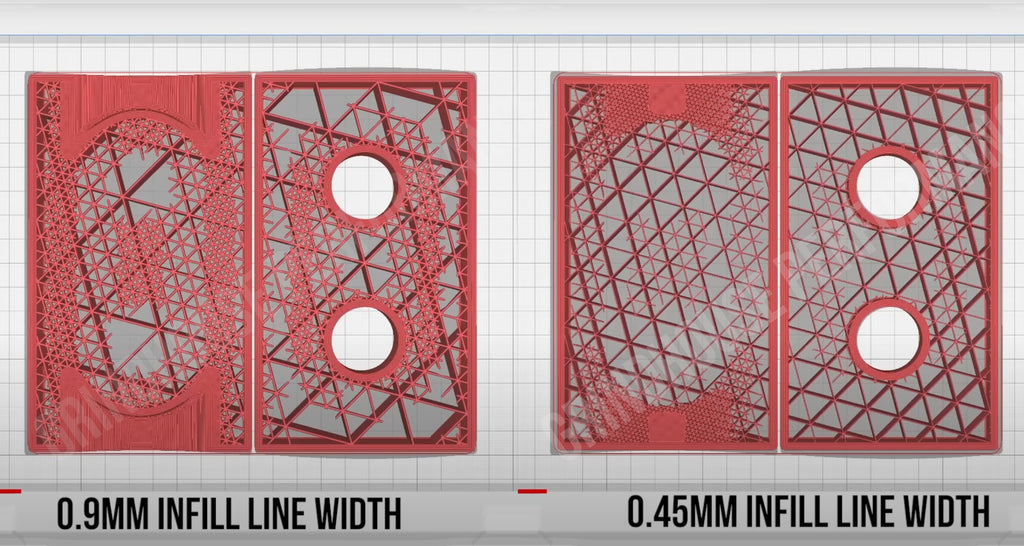
The only other adjustments made to the Cura profile was to the infill line width from .45mm to .9mm. This reduced the number of triangles and increased their width. I didn't know for sure whether this would be possible with the .4mm nozzle, but it seemed to handle the over-extrusion decently. These dies are one of the first parts I've printed with my Ultimaker S3, so this was a learning experience more than anything. You can see the differences in the models by adjusting the infill line width setting.
The bottom of the dies were filled with Fibreglast 77 Polyester Molding Resin, which I mistakenly called Epoxy Resin (many times) in the video, but there are some important distinctions between Polyester and Epoxy Resin I should explain.
- Polyester Resin shrinks considerably more during curing than Epoxy Resin
- Polyester Resin reaches a higher exothermic reaction temperature than Epoxy Resin
- Polyester Resin is significantly less expensive than Epoxy Resin
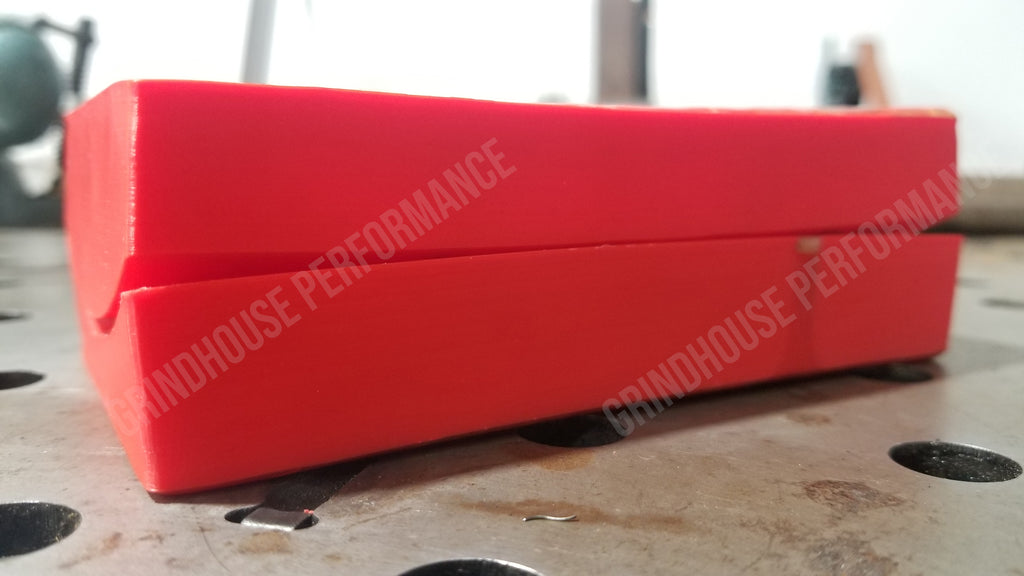
When left to cure, the polyester molding resin had two main issues that led to the dies warping almost to the point of being unusable, and that was 1) the shrink rate of the polyester pulling the die, and 2) the exothermic reaction of the polyester softening the plastic. I didn't show this terribly well in the video, but you can see in the photos below just how much of a gap was created by the warp in the dies.


Results
It's pretty incredible to think we were able to get the results we did seeing how much warpage there was in the dies, but I figured at worst case, they would break and we would start the experiment over, and best case, it would still show signs of being a success.
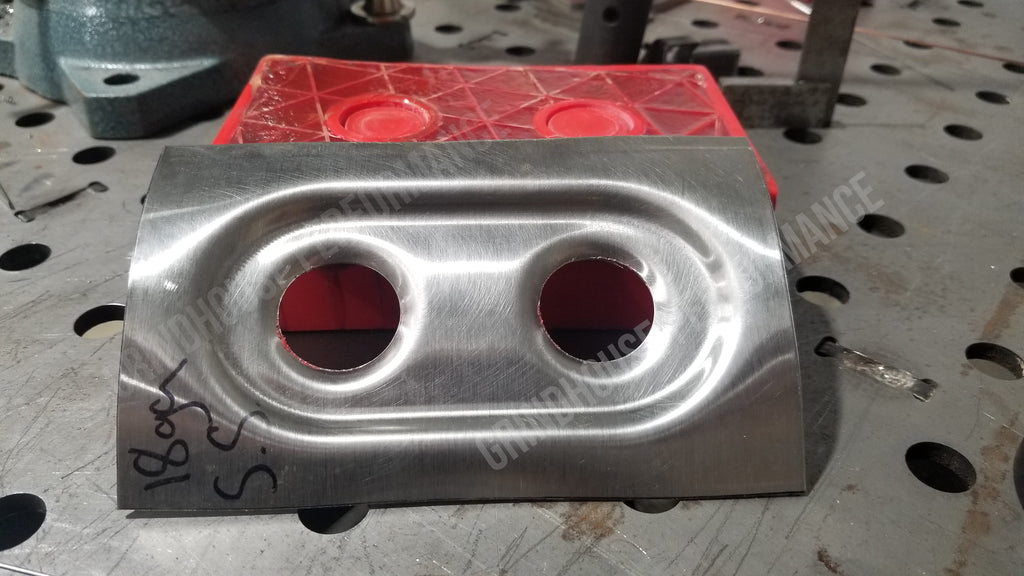
For pressing, I had cut several test plates using a small 3D printed alignment tool for the holes. In the future, I'll have these plates laser cut for the testing, as the rough cut holes did seem to cut into the plastic a bit. I didn't do much as far as cleaning or deburring everything, and I didn't use any lubrication on these tests. The video shows the results directly after pressing, the photos below show after minimal hammer & dolly finishing work.
f this experiment interested you, I tried a much larger panel in part 2 HERE.
Be sure to Subscribe to my YouTube channel for future updates on experimenting with 3D Printed press dies!


